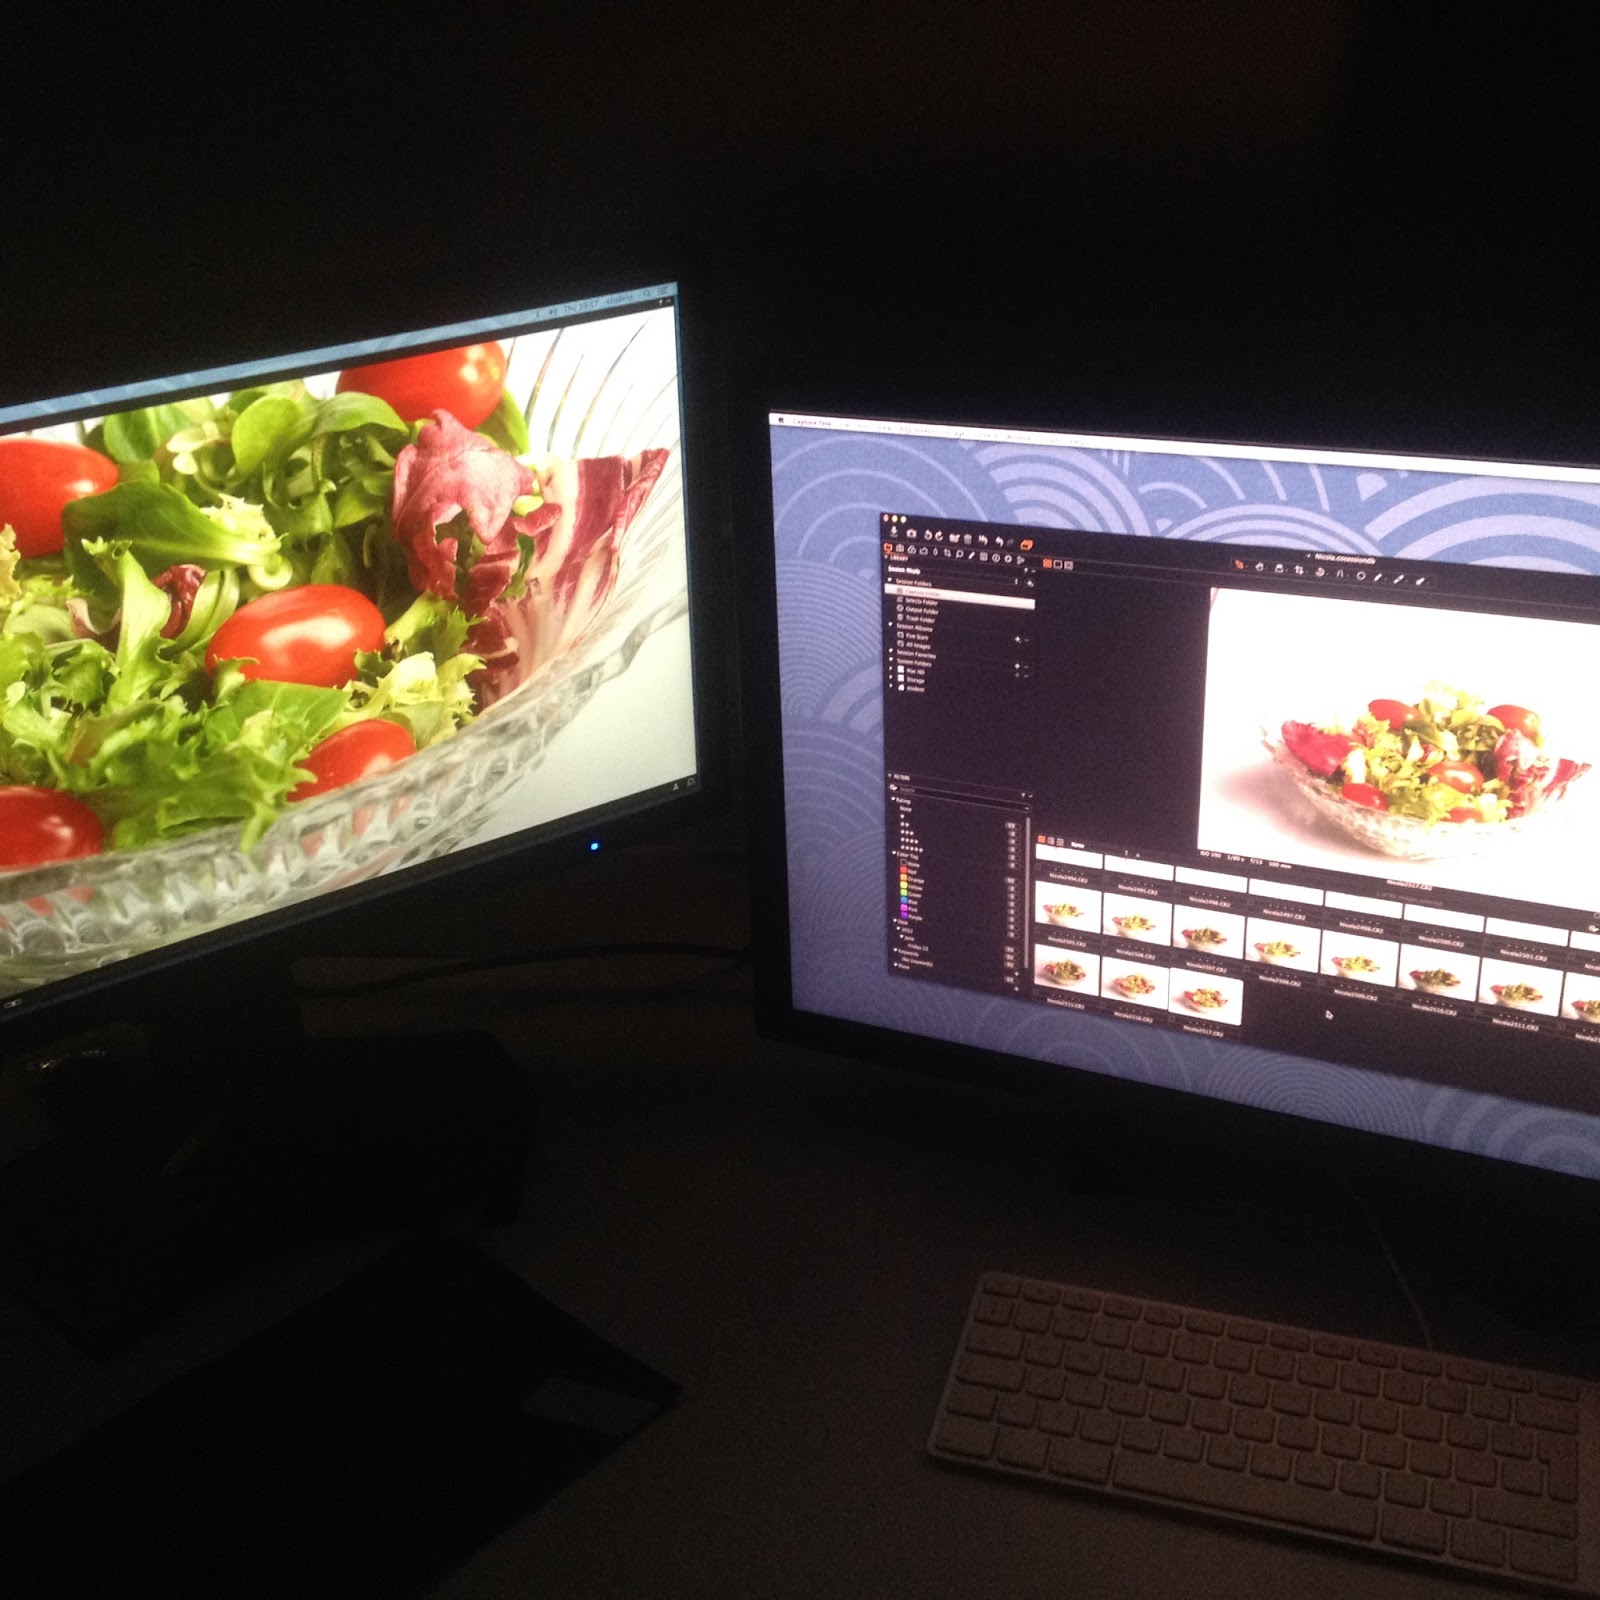
Today I went in to the studio again, this time with only Cara as Oneka was away however for the morning Rachel and Shannon had the studio 2 first, we were booked in after them at 1.30. Cara and I went in to the studio in Rachel and Shannon's time to help anywhere/ anyway we could and so they weren't on their own if they got stuck, also we would be there ready for when it was our time in the studio after them. After initially having a little struggle setting up, with the help of Tim, they managed to get the lights synched up and Rachel and Shannon began shooting. Once it was mine and Cara's turn I let Cara shoot what she had to and needed to then I reshot my food later on. I am happy with deciding to reshoot my food shot as I thought what I had shot from the previous night wasn't terrible but neither was it all that good, though I stayed til closing time the night before I was still a bit rushed for the food shot and therefore I decided to shoot it again. The first four photos are the set up we had, the first photo shows how we lit the backdrop up and the following three photos are Cara's shoots for her ILA, which was glass. The next set of photographs are the shots of my reshoot for food, where we set up the food to go around the outside of the bowl as well as in it to create more colour, fill in the space and to catch your eye and make you look around the picture.
Studying and practicing photographer from the North East of England. Studying at CCAD (Cleveland college of Art and Design) Hartlepool campus.
Example of my work
Headland/ Hometown
Friday, 8 May 2015
Still Life - Research Cigarette ILA
As I have chosen to shoot cigarettes as my finals images for my ILA (Individual Learning Agreement) I decided to do some research to see who else had photographed cigarettes as I was unsure if many would have done. One of the artists I found who had photographed cigarettes was the photographer I used for food research also, Norys Rodriguez. The link to see her work is the first one below. Her images are similar and remind me of Penn's work, I really like her shots because of this as well as the different angles she uses, I like how close up to the cigarettes she gets, a different perspective.
https://www.behance.net/gallery/4936853/Cigarette-butts
The link below is another photographer, Joanna Ference, who has shot cigarettes in a different way as these images show. She has shot them in the style of Irving Penn's work and you can see him as an inspiration through her work with the overhead shots, cigarettes lined up neatly and also the way they are placed individually.
http://www.trendhunter.com/trends/cigarette-photo-series
https://www.behance.net/gallery/4936853/Cigarette-butts
The link below is another photographer, Joanna Ference, who has shot cigarettes in a different way as these images show. She has shot them in the style of Irving Penn's work and you can see him as an inspiration through her work with the overhead shots, cigarettes lined up neatly and also the way they are placed individually.
http://www.trendhunter.com/trends/cigarette-photo-series
Labels:
Still Life 2nd Year
Location:
England, UK
Still Life - Alan Sailer
An artist I have found to coincide with my idea for my final chosen project (ILA) is Alan Sailer who has photographed cigarettes. His take is different to Irving Penn's work who I saw first. Sailer's images are colourful, vibrant and is more an action shot compared with Penn's shots of where he lines up all of the cigarettes or has them individually.

The photo belongs to Alan Sailer.
http://www.telegraph.co.uk/culture/culturepicturegalleries/8850580/Alan-Sailers-photographs-of-objects-exploding-as-they-are-hit-at-high-speed.html
The photo belongs to Alan Sailer.
http://www.telegraph.co.uk/culture/culturepicturegalleries/8850580/Alan-Sailers-photographs-of-objects-exploding-as-they-are-hit-at-high-speed.html
Labels:
Still Life 2nd Year
Location:
England, UK
Still Life - Food Research
One of the books I looked at is Digital Food Photography from the Uni library. It had some very helpful tips, advice and information in it. It gave me an idea or two for me to shoot salad, which was simplicity. I photographed the salad in a glass bowl and also shots with the salad around the bowl, this way it focusses on the food, there is nothing else to look at and by using the glass bowl you are able to see more of the salad.

Setting up for my shots, food.

Sorry about final image was unaware it was blurry until it was too late to take another pic.
Labels:
Still Life 2nd Year
Location:
England, UK
Sill Life -- Research Food
One of the things I came across whilst researching food was these great food shots by Norys Rodriguez. They stood out to me as the colour, lighting and composition of the images really look good and appealing, which is the most important thing within food photography, it has to look good and makes you want to eat it as most if not all food photography is for advertising. The images are something that I can hopefully take some ideas and techniques from and, though I've already shot food, use in my own work still. The link to the photos is below.
https://www.behane.net/gallery/10466563/Editorial-Food-Still-Life-2013
Labels:
Still Life 2nd Year
Location:
England, UK
Thursday, 7 May 2015
(7/5/15) Still Life - Shooting in the studio
Today I went to Uni with the intention to shoot 3 of my mini - assignments, Product, Food and Nature Morte. I shared the studio time with Cara and Oneka, we all chipped in and helped each other with ideas, setting up and just general things within the studio like helping place various objects for shots and checking the images for being in focus as we focussed manually and also making sure we were keeping safe, i.e wires were made aware of. I got in for about 10.30 and stayed till 9 at night. Oneka and Cara shot most of their images first and I got one or two done in between, as I was booked in after. We put all our names in to book the studio together so we could all work within the studio together and have about 6 hours all together, which works best as we don't get disturbed, can keep our set up and luckily no one was booked in after so I was able to stay till late, meaning I didn't mind at all letting them get on with their ideas and shoot, though they still let me shoot in between here and there, a team effort! One of the biggest things I like about this course is the people, my peers, helping each other get the work done, people don't mind because they know if they need the help it's there, the help gets returned. At dinner time I popped out to get the salad for my food shop and also got flowers for mine and Oneka's Vanitas/Nature Morte as we had decided to do a photo together, as we were both actually in the original group we got given and both had missed the group's final shot, though I was there the first day, we didn't end up shooting anything as not all the group was there and therefore didn't have all of what we needed, so we brainstormed some other ideas, Jodie, Grant and I. I bought both white and red roses though in the end only used 1 white rose throughout various photos and vanitas. The shoot went quite well and I am happy with the outcome and glad I stayed till 9 as it allowed me to have a few hours working on my own and so I think I did quite well, I did a few shots using a perfume bottle(s) and a single flower, which can be used for product potentially as well as the cans and chocolate bar. Overall it was a very productive day with 3 assignments shot, Vanitas, Product and Food. I've already done Documentary and I'm now left with Montage. Below are a few of photos just to show the set up today, fairly simple but effective.


Labels:
Still Life 2nd Year
Location:
England, UK
Wednesday, 6 May 2015
Still Life - Documentary/ Practice, Ideas shoot
Unedited/ Untouched photos.
These photos are from the same shoot, (the previous two posts). I like the look of these photos quite a lot and I am pleased with how they turned out. The lighting, in my opinion, was good and I like the shadows created. I like the look of the first image's angle however the paper edge which is visible would need to be fixed, with a simple resolution, possibly a longer piece of paper where the end isn't visible and that would then take out the background currently used and the longer paper would become the background. The second photo is where it starts with the overhead shots, more like Irving Penn's photographs of Cigarettes, which is the inspiration for this style of shot. The third and fourth shot are in the same style. Like previously mentioned, I like the lighting on all photos except the first one as the shadow, I personally don't think quite works, mainly because of the angle of the shot however regardless of the shadow I do like the angle though. The third and fourth shots are my favourite out of these four and out of the third and fourth I'd have to say the fourth photo was my favourite because of the variation in the ash lying about within the shot, I think it makes the difference and I think it works well for the shot. I like the positioning of the cigarettes as well, though not too dissimilar to the previous shots, in this image they're not quite as straight and lined up as equally. The top and bottom needs to be cropped otherwise I think it is a good overall image.
Labels:
Still Life 2nd Year
Location:
England, UK
Still Life - Documentary/ Practice, Ideas shoot
Unedited/ unaltered photos.
Within the same shoot I shot the same style as before (previous post) the only difference was the ashtrays. Like mentioned in the previous post, this is the white, Union Jack ashtray. I did the same shots, same lighting and setup. I used more cigarettes in the majority of the photos in this ashtray, the least I used was 4 cigarettes in the 3rd photo down. I think the last photo, out of the white ashtray is the best as it is central, unable to see the edges, fairly symmetrical and has good lighting on it. There is a part of it at the top of the ashtray where it is slightly darker however I don't mind that as the shadow would be naturally there as it is natural light.
Labels:
Still Life 2nd Year
Location:
England, UK
Monday, 4 May 2015
Still Life - Documentary/ Practice, Ideas shoot
For the documentary I had decided to document cigarettes and more specifically what they look like after my mother has smoked them and left them in the ashtray. I have took some images of the cigarettes in and out of the ashtray for my first practice, ideas shoot, the ones out of the ashtray I lined them up on a white background and base. I was inspired by some shots taken by Irving Penn and so did the same sort of idea with the cigarettes I had. The shots are below, untouched/unedited.
The first two show the set up. It was very simple, I placed the ashtrays and cigarettes on top of an an envelope and I used my window ledge as a base to put these on as I used the natural light for these photos.

The next set of photos show what I did next, how I set the cigarettes up and lit them. I kept them in the glass ashtray first trying out different angles and amounts of cigarettes and ash within the ashtray. After I looked at the images a second time I noticed the photos, though it was a test/ ideas shoot, the photos could have been a little better on the sides where you are able to see the edges of the paper. On the second photo however I would be able to crop that and solve the issue without it looking too cropped I don't think as it will even up with the other side. I liked the glass ashtray as the light hitting of the glass looked good with the shine, compared with the white/Union Jack ashtray. I also like the fact that the ashtray is glass as it's therefore see through, allowing the light to pass through, lighting the contents.
The first two show the set up. It was very simple, I placed the ashtrays and cigarettes on top of an an envelope and I used my window ledge as a base to put these on as I used the natural light for these photos.
The next set of photos show what I did next, how I set the cigarettes up and lit them. I kept them in the glass ashtray first trying out different angles and amounts of cigarettes and ash within the ashtray. After I looked at the images a second time I noticed the photos, though it was a test/ ideas shoot, the photos could have been a little better on the sides where you are able to see the edges of the paper. On the second photo however I would be able to crop that and solve the issue without it looking too cropped I don't think as it will even up with the other side. I liked the glass ashtray as the light hitting of the glass looked good with the shine, compared with the white/Union Jack ashtray. I also like the fact that the ashtray is glass as it's therefore see through, allowing the light to pass through, lighting the contents.
Labels:
Still Life 2nd Year
Location:
England, UK
Tuesday, 14 April 2015
Pro Studies - New Blog
I have created a new blog to display my best work/photos. I also may however show some photos that are tests, in the making and trial and errors. The blog will be mostly focussed on my photos though may have some text in as well to explain the images.
http://nicolalcallaghan.blogspot.co.uk/
Labels:
Pro Studies 2nd Year
Location:
England, UK
Monday, 13 April 2015
Pro Studies(13/3/15) -
The last lesson before my tutorial and before the break for the Easter Holidays. We went over everything needed for the report and a few extra things. The title of the report is the title of the brief 'Working within the Photographic Industry'. I need to blog, have a digital archive of my photos (best work) and have a CV as well as write the report. Other things we went over have been mentioned in previous blog posts, just things need to write the report and actually how to write the report and what to put in appendices etc and about the summary etc. The blog to include a mixture of taught sessions, research, ideas, artists, industry and evidence to support my knowledge of the appropriate creative industry. To upload the report and CV as a PDF when submitting so nothing can be altered and changed.
In the lesson we also got told about Alamy, which has a plentiful stock of photos if you are looking to purchase one/ some. It sells the rights of images so you can use it for a certain number of time. Photographers can sell their images on their for people to use for the company or brand etc.
http://www.alamy.com/
Another website where you can buy the rights to an image is Stockimo (part of Alamy), which has images taken on Iphones. https://www.stockimo.com/
Another, separate website to buy photos is Millennium Images http://www.milim.com/
In the lesson we also got told about Alamy, which has a plentiful stock of photos if you are looking to purchase one/ some. It sells the rights of images so you can use it for a certain number of time. Photographers can sell their images on their for people to use for the company or brand etc.
http://www.alamy.com/
Another website where you can buy the rights to an image is Stockimo (part of Alamy), which has images taken on Iphones. https://www.stockimo.com/
Another, separate website to buy photos is Millennium Images http://www.milim.com/
Labels:
Pro Studies 2nd Year
Location:
England, UK
Pro Studies(28/11/14) - Pricing and Costing
Another lesson for professional studies was on pricing and costing our work. We learned that the value of our work is influenced by a number of various factors:
Quality & Distinctiveness
Reputation & Experience
Geographic Location
Competition from others and lastly price.
Is the price I'm selling at profitable from the cost of my work.
OVERHEADS - Costs general to the business
DIRECT COSTS - Specific to a piece of work
We were told of websites to look at regarding this, they are:
https://www.nuj.org.uk/site-search/?keywords=freelance+fees+guide
https://www.a-n.co.uk/explore/news/for/the+artist+fees+toolkit
For the selling and cost - Work out how much it costs to print the image then times that by 4, rough guide. Think who you're selling it to.
Quality & Distinctiveness
Reputation & Experience
Geographic Location
Competition from others and lastly price.
Is the price I'm selling at profitable from the cost of my work.
OVERHEADS - Costs general to the business
DIRECT COSTS - Specific to a piece of work
We were told of websites to look at regarding this, they are:
https://www.nuj.org.uk/site-search/?keywords=freelance+fees+guide
https://www.a-n.co.uk/explore/news/for/the+artist+fees+toolkit
For the selling and cost - Work out how much it costs to print the image then times that by 4, rough guide. Think who you're selling it to.
Labels:
Pro Studies 2nd Year
Location:
England, UK
Pro Studies (7/11/14) - Report Writing
One of the lessons we had for our professional studies was on report writing. In the lesson we were given a run down of the does and don'ts in report writing. From my notes I learned that: a report is not as in depth as an essay, it is mainly stating facts, it is best to use short paragraphs, short sentences. Also to use short facts, e.g could use bullet points whenever necessary and as many times as you wish. Some basics were also mentioned, things that I already knew but they are good to hear again. Things like a summery is the main point of the conclusion, sums up everything you have talked about in a small paragraph or two. It is outlining what the report is about. For the report we use the same referencing style as an essay. We got told what to use for Primary research (Questionnaires, interviews, surveys, museum visits etc) and Secondary research (Books, journals, internet) and that we can only use 10% internet, just like our essays. We got told to consider what information we will need and want for our report, need to think of a list of specific, to the point questions and link the facts logically. Write the report in third person. The intro slightly differs from the summary, though the summary is at the top of the report and not nearly last at the bottom. Recommendations are how the matter could be resolved and to list them by priority, so the most important at the top of the list. We also got told what appendices are and what to place in this section of the report. This can include visits, leaflets, emails both sent and received, questionnaires and anything else to add to the report which we may not have included before. For actual writing aspect we were told to keep it short and to the point, and to try not repeat what we've already said too much. Presentation wise we were also told to bullet point lists, don't have to write sentences, just to bullet point the facts. Space out lines (1.5 line space) and to keep it the same so it flows and looks right. It's best to check over and proof read the report. Paragraphs to be used for intro, conclusion and main body. Write the date you looked at the website for referencing if you used the internet.
Labels:
Pro Studies 2nd Year
Location:
England, UK
Pro Studies Entered a Competition
For part of my report I have to enter a competition and write about it with a part of the photography industry. The competition I chose was by the AOP (Association Of Photographers). It was a student award/ competition which I entered and within the four briefs given I chose to enter a one about animals charity in which you have to enter a photo that can be used online to advertise what the(se) charity(charities) do for the animals. The four pictures I decided to enter are:
Labels:
Pro Studies 2nd Year
Location:
England, UK
Pro Studies (26/9/2015) - What do artists do all day?
For one of the lessons in Professional Studies we watched a BBC Four programme called 'What Do Artists Do All Day?'. The artist on the particular episode we watched was named Cornelia Parker. She is English, has an OBE, she was nominated for a turner prize and is a installation and sculptor artist. Whilst we were watching the programme we were asked to write down some notes about her professionalism. One of the things I noticed while watching, and what I jotted down was, what she does as part of her art is to hook ordinary things together and turns it in to art. One of the things she said was, for her art, she collects material that is deteriorating and which looks unusual. Cornelia also mentioned that it shouldn't feel like you're forced to do it and she doesn't necessarily always know what she is doing but has an inkling and goes with it. She has a vision of how she wants to show and communicate her art and is very self motivated.
Labels:
Pro Studies 2nd Year
Location:
England, UK
Pro Studies - Entering a Competition
After some of the competitions that have past there is still one on the AOPs (Association of Photographers) that I can enter. The AOP Student Awards 2015, there are 4 categories to choose from. These are 1) Social Media - Animal Conservation. 2) Product shot - Sense 3) Brand Image - Charity 4) Sunday Supplement Cover. I will go in to these in more detail later on. I am unsure which one to choose as of yet.
Labels:
Pro Studies 2nd Year
Location:
England, UK
Pro Studies - Competitions
As part of my report just under half of it is around me entering a competition. There has been portrait competitions and many others to choose from, I will inform you more when I have done further research and hopefully will have come to a conclusion on which one I will be entering.
Labels:
Pro Studies 2nd Year
Location:
England, UK
Pro Studies - Archive of my photos
As well as the report I have to select some of my best work and present them on, (I've chosen blogger). I will be looking through and going over the photos that I have taken and choosing the ones that I think are my best and show of my abilities best. I'll pick ones that overall and together combined show a range of photography from portraits in the studio using a 5D Mark 2 to street photography using a 35mml film camera and using my own camera taking my own photos in my free time. I'm not quite sure how many I will select yet as this choice is left up to us however I will try not to choose too many as this will also affect my mark as I will be judged on the choice I make of how many to show as it will determine my editing skills, (do the photos work together as a group, are there too many or not quite enough).
Labels:
Pro Studies 2nd Year
Location:
England, UK
Sunday, 12 April 2015
Pro Studies - C.V
For one of the parts of my hand in for pro studies I have to write a skill based CV. I already had a CV so I planned on altering it to fit in with more of the photography based skills and updating it more. This will be just like a normal C.V but will take out the unnecessary information that isn't relevant to photography. Things like my old GCSE results and past work that isn't photography related.
Labels:
Pro Studies 2nd Year
Location:
England, UK
Pro Sudies - Assignment
For this years assignment we were given a 2500 word report to write however this time it was split in to a 1500 word report on a part of the photographic industry and 1000 words on writing about entering a photographic competition. For the chosen topic I decided to stick with landscape photography. I originally planned to write further in detail about landscape photography, e.g what cameras actual landscape photographers use and other equipment also, where they go to take the photos and what prices they'd sell etc. After having my tutorial it was agreed that I would ask a few landscape photographers some questions regarding being mainly a landscape photographer and what that entails, e.g prices of photographs, how they got in to photography and specifically landscapes. Along with the report we have to also hand in a skill based C.V, (photography based) as well as a collection of my best photographs presented, I chose to show them on blogger and lastly blog posts for Professional Studies.
Labels:
Pro Studies 2nd Year
Location:
England, UK
Friday, 10 April 2015
Still Life - Food Idea(s)
At first I was unsure of what to shoot. I thought maybe soup as I thought it seemed quite simple but could look effective however I then thought of choosing salad instead as this would be easier to shoot in the studio (no possible spillage, plus as requested by the brief to use the studio). The food choices we had to choose from were salad, sushi, soup, ravioli or some form of pasta(cooked or not) and limeade. Out of the choices and because of having to shoot in the studio I thought using salad would be best. Once that was settled I then went on to do a bit of research and looked at other photographers photographs of salad (food) to try and get some ideas and inspiration as I have never shot food before so wasn't coming up with too many ideas of how to shoot it that I was happy about. As the maximum lights I'm able to use is 2 flash heads (because of the brief) I think I will use 1 for lighting up the background and 1 focussed on the salad but not too close.
Labels:
Still Life 2nd Year
Location:
England, UK
Thursday, 12 March 2015
Still Life - Product (Practice shoot)
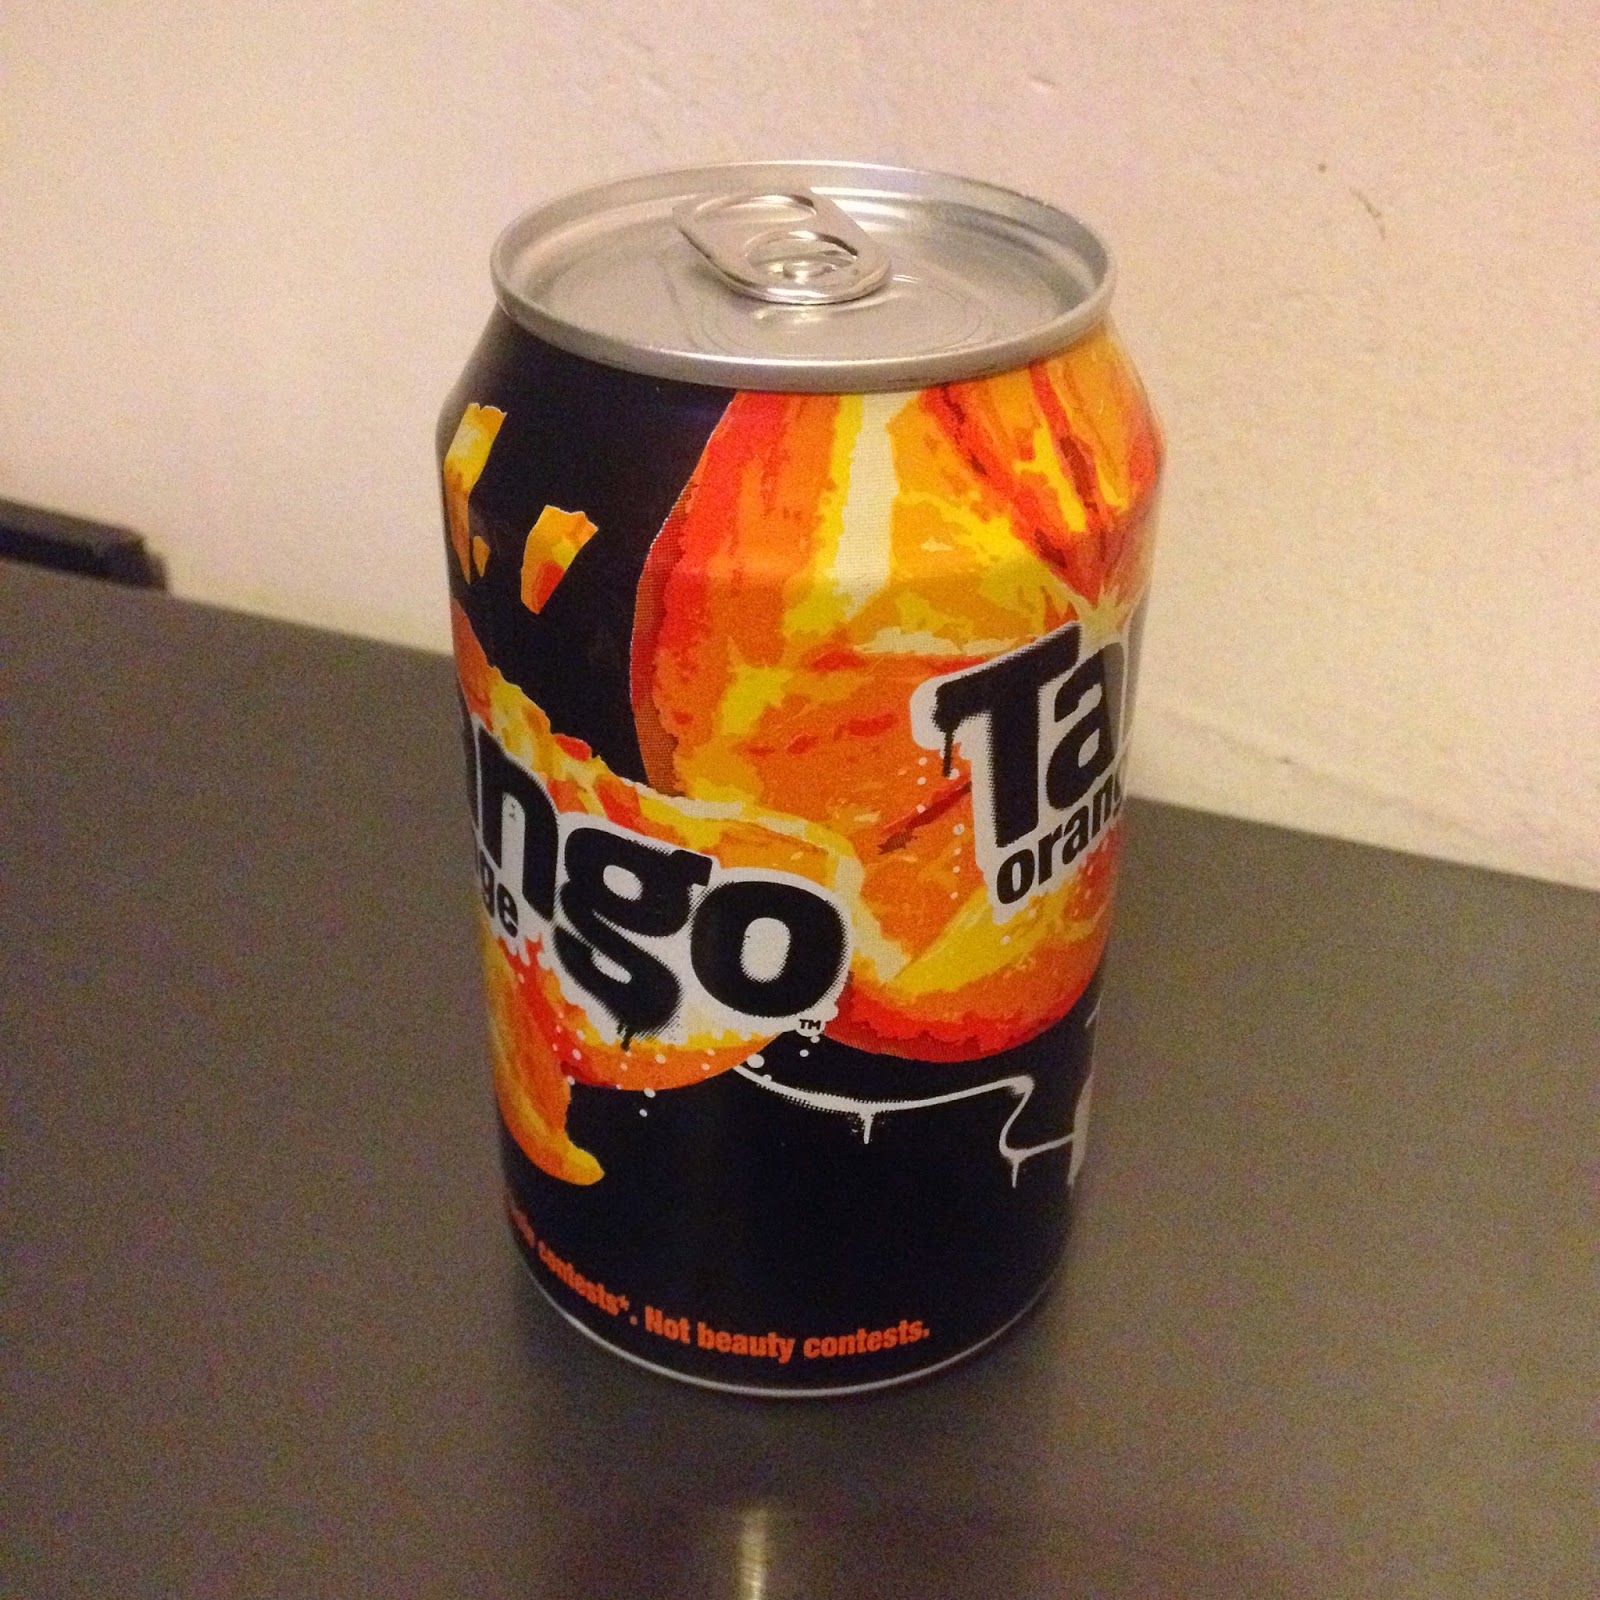
For the 'Product' idea I just shot a Tango can I had to get some ideas going of what I could shoot for it, and also things like; angle, style and final. As shooting from home I kept it quite basic and simple, which I think I would have done anyway, i.e simple and plain background and also base. I shot from various angles to see which I preferred when it comes to shooting the final for the 'Product' Mini Assignment. For the lighting I just used one light from above which was the ceiling light.
After shooting the first three images I decided to turn the can around so you are able to actually see the label of the brand. I didn't at first as I just concentrated and focussed on trying out different angles.
Labels:
Still Life 2nd Year
Location:
England, UK
Wednesday, 4 March 2015
Still Life - 1st two Mini Assignments (Food & Product)
For the first mini-assignment we got asked to take pictures of Food and then the second mini-assignment was Product photography. Both of these were around two week projects and we had to pick a minimum of one final picture of each and print it out. I missed theses first two and haven't quite decided what to shoot for food photography but will be going more in depth of it soon. I did think of a breakfast but this is fairly popular and has been done before so I may just use this as a practice. For Product photography I have thought of shooting a Lucozade bottle and have done little test shots with a Tango can just as practice and demonstration. I will Shoot both properly and then decide a final image however I may, as well as shooting these, think of something else I could do and choose this instead.
Labels:
Still Life 2nd Year
Location:
United Kingdom
Sunday, 1 March 2015
Still Life - Idea (Documentary)
In the first lesson, for the first time, I thought of an idea of what I could shoot for this semi - assignment within the main overall project brief. The idea of cigarettes popped in my head for some reason, I don't smoke but know plenty of people who do and one of whom is my mam, therefore I would be able to do this idea fairly easily. I thought of doing this for 'Documentary Photography' as it will be documenting my mother's cigarettes as she smokes. She has quite a few times but has smoked since I can remember really. As we began research on the general topic (documentary) or your own idea if you had one, during lesson two people each told me of artists who had photographed cigarettes to some degree, both of whom I had heard of. One was Irving Penn who I found out about during the beginning of first year and the second was Rankin, who I had previously found before Uni.
Labels:
Still Life 2nd Year
Location:
England, UK
Saturday, 28 February 2015
Still Life - 26/2/15 (Documentary) 1st Lesson Introduction & Ideas generation.
For the first lesson we got introduced to some photographers who have shot 'Documentary Still Life'. A few examples are Raphael Dallaporta, Stephen Gill and Narelle Autio which we had discussions about their work and what people thought of them and comparing the works together as well. After we had a look at a selection of photographers, which was supposed to give us some insight to the genre and possibly give us some ideas and/or starter points we then were asked to go and do some research on the topic and find some more inspiration to try and find an idea to progress with. If we already had an idea then look into this further and try to expand your thoughts on it.
Labels:
Still Life 2nd Year
Location:
England, UK
Thursday, 26 February 2015
Still Life - New Project
My last project for 2nd year is twice as long (around 14 weeks) and is a combination of both Commercial and Fine Art style work. We have to do both types of photography and through this, as it helps us pick for our final year by giving us a slight insight to both styles, we gain experience in the two genres. The first to look at is Food, second Product, thirdly Documentary, fourthly Nature Morte/ Vanitas and lastly Digital Montage. After we have the five mini series we then write our own Individual Learning Agreement (ILA) which is me writing my brief based on what I have chosen to produce for my final outcome of the overall brief set for us. After each of the mini assignments I have to choose at least one image sized A3 or 12'' x16'' for a total of at least 5 prints then from that a minimum of two final prints sized A3 or 12'' x 16'' for my ILA. Each assignment is a two week mini course split in to seminars/ lectures, shooting, research, technical demonstratins and group critiques.
Labels:
Still Life 2nd Year
Location:
England, UK
Wednesday, 25 February 2015
Portrait - Jon Brock
Here again I found earlier another photographer who uses large format, but not just for portraits, also for landscape as well. The link to his work is below;
http://www.jonbrockphotography.com/info.html
Portrait - Mark Cator
An artist I found who uses large format cameras for portraits and has some great work; the link is below.
http://www.markcator.co.uk/gallery/collections/the-polaroid-portraits/
Portrait - Ben Anderson
Another artist I found who uses large format has written some useful advice for people who aren't as familiar with using them, it goes in to great detail. This can be very useful to beginners, the link is below;
http://benneh.net/techshit/tips-on-large-format-photography-what-they-dont-tell-you/
Wednesday, 4 February 2015
Portrait - 22/1/15 Black and White Printing 2nd time
The second time printing, I spent the rest of the day in the dark room up until 7. I had already done my exhibition piece (20x24), which was the old man with his eyes closed and also I used him for one of my three littler prints (9.5x12). I began focussing on printing an image of Ben, (one of my classmates) who I spotted outside and asked if I could take his photograph. I really liked this image as it had worked pretty well, the only problem I had noticed, though I had seen the issue while taking the photograph, was the background, (the church) was wonky. The tones in the photo came out well and is one of the reasons I prefer it out of the other two black and white photos I took. The other reason I prefer it is, ignoring the wonky background, because out of the other two the person is in complete focus and the eyes are open. In regards to the others, the man has his eyes closed because it blinked and the girl is blurry because she moved slightly when I took the photo. However both of these I could have prevented and I can learn from this. I am really happy with how the photo of Ben came out and because of this I therefore chose to print it out onto the 20x24 sized paper as well. As I hadn't much choice with what photos I had I made do with what I was available. Although the photo of the girl is blurry for some reason I still quite like the shot. Due to this I chose it as my final 9.5x12 print. Printing both the Ben photo and the girl was fairly easy, there wasn't any major problems. I did test strips, worked out the timings and printed my final images. I worked on the same deveer as previously (the 1st one straight to the right as soon as you walk in) so I new how to work with it and the settings roughly that I had used before. I enjoyed printing my own photos again as I like to watch them come through in the developer solution and working to get the print as best as you can. There is also a sense of accomplishment and achievement because I have done it myself.
Portraiture Large format camera
For this project I had to use the 5x4 large format camera again. I had last used it for the Landscape project. Within this particular project (Portraits) I used the field camera for taking my black and white photos outside which I would also then print myself. Once you get used to using this camera, like any other camera by practice, it becomes easier to use and not daunting. I enjoyed using this camera because I liked the square photo shape because of using the 5x4.
Below is a link dedicated to the large format camera;
http://www.lf-photo.org.uk/participants.htm
Below is a link dedicated to the large format camera;
http://www.lf-photo.org.uk/participants.htm
Monday, 2 February 2015
Portrait - Ideas generation B+W photos
For my black and white shots, at the first shoot, I had decided to take my photos outside of the church (now an art gallery and information centre). I picked outside the main entrance as I liked the symmetry of, not just the doorway and building itself, but outside as well. I decided to take all my photos outside there in the same spot as, like I mentioned about the symmetry but also then because of this all of my photos will have the same background but with different focuses on them and will look more like a body of work, joined together because of the same background. I was just going to take pictures where ever we (the people I'd shoot with) set up as it would be a little different in each photograph and would have various people in the shots due to the area in which we chose and this would be reflected in the background of the photo. Once I started to shoot however I decided to use the front entrance of the church and this is what I stuck too.
Subscribe to:
Posts (Atom)